 Author :
Are you thinking of digitizing your credential issuance system but have no clue how to create and share one? Well, then you are in the right place.
Shifting from traditional certificates to digital credentials is not a tech-heavy implementation, at least if you choose a platform like CertifyMe. Creating white-labeled digital credentials is a simple step-by-step procedure once you set up your account with us.
Not only this, but sharing a digital credential with students is easy too. So, stay with us throughout this blog to create your first digital credential with CertifyMe.
TL;DR
- Digital credentials can be created easily using ready-made templates without technical expertise.
- Institutions can issue credentials instantly to individual students using quick issuance features.
- Bulk issuance allows universities to award credentials to entire batches using a simple CSV upload.
- A structured digital credentialing platform ensures secure sharing, scalability, and long-term verification.
How to Create a Verifiable Credential?
Creating a verifiable credential on CertifyMe is a structured but simple process. Universities and educational institutions can design certificates or badges without any technical setup by following these steps.
Log In or Create a CertifyMe Account
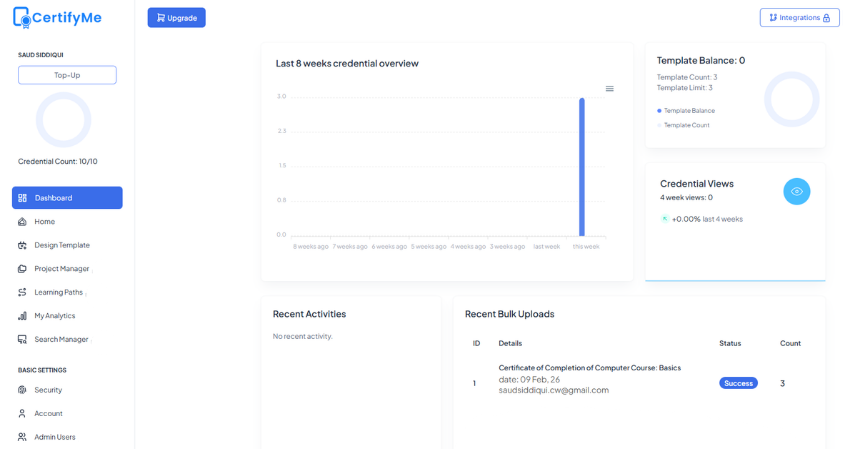
Start by logging in to your CertifyMe account. If you do not already have an account, you can sign up using basic institutional details. Once logged in, you will land on the dashboard.
From the dashboard, look at the left-hand menu. Just below the Home button, you will find the Design Template option. Click on it to begin creating a new credential.
Follow Three Simple Steps to Create Credential
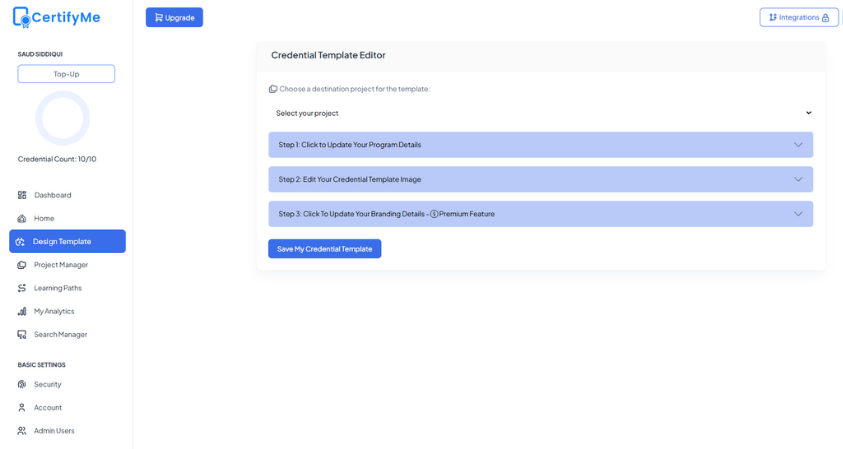
Now, click on “Design Template” to access the credential template editor. Here, you’ll find three simple steps to create your own template.
Step 1: Update your program details.
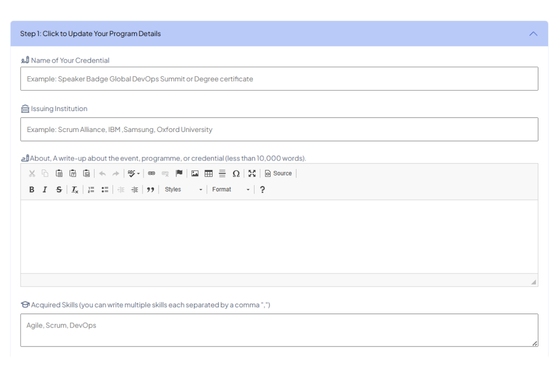
In this section, you will enter the core information of your credential, including:
- Credential name
- Issuing institution name
- Credential description to provide context
- Acquired skills that learners gain through the program
- Credential signatory name
- Earning criteria that define how the credential is achieved
This information helps verifiers clearly understand what the credential represents and how it was earned.
Step 2: Edit your credential template image
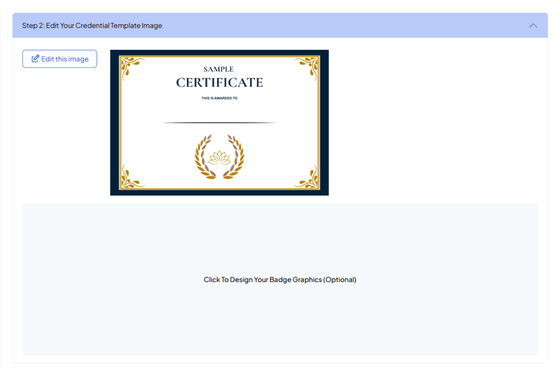
Click on Edit this image, which opens the visual editor. Here, you can fully customize the look of your certificate or badge. You can adjust layout elements, text placement, and visual components to match your institution’s branding. Once customization is complete, click Save to apply the changes.
Step 3: Update your branding details
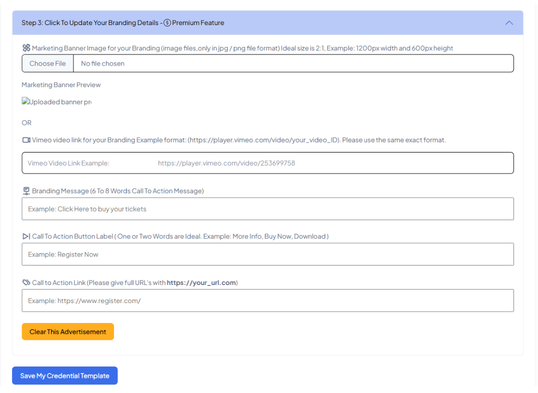
You can enhance the credential with additional branding elements, like:
- Marketing banner
- Branding message
- Call-to-action button label
- Call-to-action link
- Optional video link
These elements help institutions extend brand visibility while keeping the credential informative and professional.
After completing all three steps, finalize the process by clicking Save my credential template. Your verifiable credential certificate or badge is now ready to be issued to students.
How to Issue a Credential to a Student?
Once your credential template is ready, issuing it to a student is a quick and straightforward process. In CertifyMe, this is done using the Quick Award feature, which is ideal for issuing individual credentials.
Step 1: Select the Credential Template
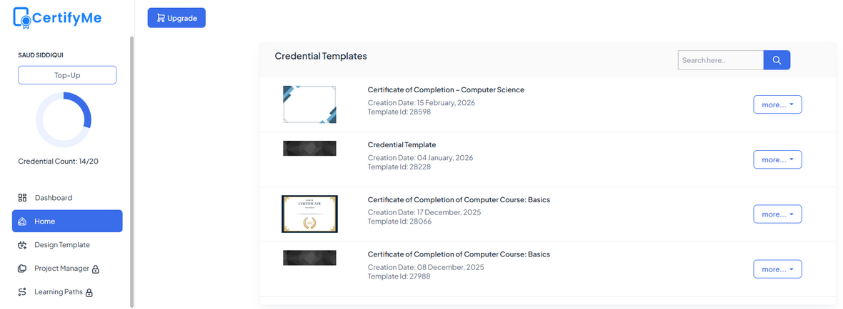
Start by going to the Home page of your CertifyMe dashboard. Here, you will see all the credential templates you have already created.
Click on the “more” button of the template you want to issue and select “award credential” from the drop down menu. This will take you to the Award Credentials page.
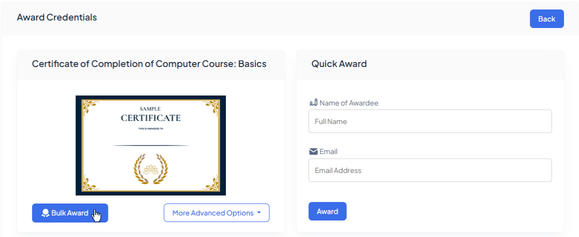
Step 2: Use the Quick Award Option
On the Award Credentials page, you will see the credential preview on the left side. On the right-hand side, you will find the Quick Award section.
In this section, enter:
- The name of the awardee
- The email address of the awardee
The email address is important, as the issued credential will be delivered directly to the student’s inbox.
Step 3: Award the Credential
After filling in the required details, simply click on Award.
The credential is instantly issued and sent to the student via email. The student can then access, store, and share the credential securely using the verification link provided.
Automating Credential Issuance at Scale
Universities and educational institutions rarely issue credentials one at a time. In most cases, digital badges, certificates or transcripts are awarded to entire batches of students at once. This is where bulk issuance becomes essential. Instead of repeating the same steps for every student, bulk issuing allows institutions to issue hundreds or even thousands of credentials in a single workflow, saving both time and effort.
CertifyMe’s Bulk Award feature is designed specifically for this purpose.
Step 1: Click on the Bulk Award Option
From the Award Credentials page, select the credential template you want to issue. Just below the selected certificate, you will find the Bulk Award button.
Clicking on this button will take you to the Bulk Award page.
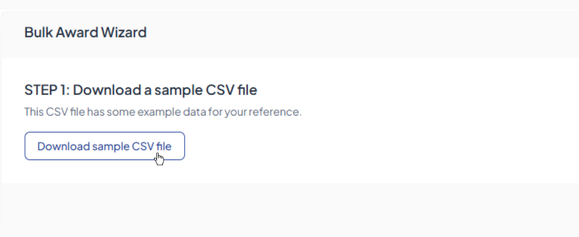
Step 2: Download the Sample CSV File
On the Bulk Award page, the first step is to download the sample CSV file.
This file contains the required structure for bulk issuance. You simply need to add student details such as names and email addresses for all recipients in this file. Once all the information is added, save the file on your system.
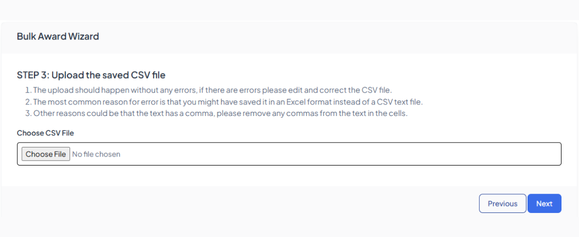
Step 3: Upload the Completed CSV File
After preparing the CSV file, return to the Bulk Award page and click Next.
You will now see the option to upload your file. Click on Choose File, select the completed CSV file, and proceed by clicking Next again.
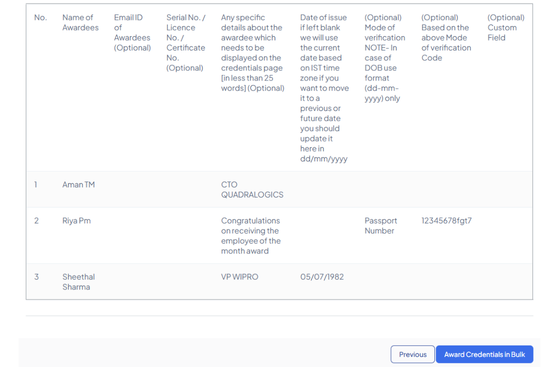
At this stage, CertifyMe fetches and displays all the student data from the file, allowing you to review the details before issuance.
Step 4: Initiate Bulk Issuance

Once everything looks correct, click on Award Credentials in Bulk to start the issuance process.
If your workflow requires approval, the credentials can be sent to the Drafts section for review before being issued. Otherwise, the credentials are directly sent to the students’ email addresses.
This approach ensures fast, accurate, and scalable credential issuance without manual repetition.
Conclusion
Creating and sharing digital credentials does not have to be complex or technical. With the right platform in place, educational institutions can design, issue, and manage credentials in a structured and secure way.
From single awards to large-scale bulk issuance, CertifyMe simplifies student record management from day one. So, if you are ready to digitize your credential issuance process, start for free with us.